Vue 路由
Vue 中的路由用於導航 Vue 應用程式,它在客戶端(瀏覽器中)發生,無需完全重新載入頁面,從而提供更快的使用者體驗。
路由是一種導航方式,類似於我們之前使用動態元件的方式。
透過路由,我們可以使用 URL 地址將使用者引導到 Vue 應用程式中的特定位置。
使用動態元件導航
要理解 Vue 中的路由,我們首先來看一個使用動態元件在兩個元件之間切換的應用程式。
我們可以使用按鈕在元件之間切換
示例
FoodItems.vue:
<template>
    <h1>Food!</h1>
    <p>I like most types of food.</p>
</template>
AnimalCollection.vue:
<template>
    <h1>Animals!</h1>
    <p>I want to learn about at least one new animal every year.</p>
</template>
App.vue:
<template>
  <p>Choose what part of this page you want to see:</p>
  <button @click="activeComp = 'animal-collection'">Animals</button>
  <button @click="activeComp = 'food-items'">Food</button><br>
  <div>
    <component :is="activeComp"></component>
  </div>
</template>

<script>
export default {
  data() {
      return {
        activeComp: ''
      }
    }
}
</script>

<style scoped>
  button {
    padding: 5px;
    margin: 10px;
  }
  div {
    border: dashed black 1px;
    padding: 20px;
    margin: 10px;
    display: inline-block;
  }
</style>
從動態元件到路由
我們使用 Vue 構建 SPA(單頁應用程式),這意味著我們的應用程式只包含一個 *.html 檔案。這意味著我們不能將使用者引導到其他 *.html 檔案來向他們展示頁面上的不同內容。
在上面的示例中,我們可以在頁面上的不同內容之間導航,但我們無法向其他人提供頁面的地址,以便他們直接訪問有關食物的部分,但透過路由我們可以做到這一點。
如果適當設定了路由,當您在 URL 地址後新增副檔名(例如“/food-items”)開啟 Vue 應用程式時,您將直接進入包含食物內容的部分。
安裝 Vue 路由庫
要在您的機器上使用 Vue 路由,請使用終端在您的專案資料夾中安裝 Vue 路由庫
npm install vue-router@4
更新 main.js
要使用路由,我們必須建立一個路由器,我們在 main.js 檔案中完成此操作。
main.js:
import { createApp } from 'vue'
import { createRouter, createWebHistory } from 'vue-router'

import App from './App.vue'
import FoodItems from './components/FoodItems.vue'
import AnimalCollection from './components/AnimalCollection.vue'

const router = createRouter({
    history: createWebHistory(),
    routes: [
        { path: '/animals', component: AnimalCollection },
        { path: '/food', component: FoodItems },
    ]
});

const app = createApp(App)

app.use(router);
app.component('food-items', FoodItems);
app.component('animal-collection', AnimalCollection);

app.mount('#app')
第 2、8-14 和 18 行已新增,以新增路由器功能。
第 19-20 行已刪除,因為元件已透過第 11-12 行的路由器包含在內。
我們現在已經建立了一個路由器,例如,如果將“/animals”新增到原始 URL 地址的末尾,它將開啟“AnimalCollection”元件,但直到下一節我們新增 <router-view> 元件時,它才能工作。路由器還會跟蹤網頁歷史記錄,以便您可以使用通常位於網頁瀏覽器左上角 URL 旁邊的箭頭在歷史記錄中前後移動。
使用 <router-view> 元件
要使用新路由器更改頁面上的內容,我們需要刪除上一個示例中的動態元件,並改用 <router-view> 元件。
App.vue:
<template>
  <p>Choose what part of this page you want to see:</p>
  <button @click="activeComp = 'animal-collection'">Animals</button>
  <button @click="activeComp = 'food-items'">Food</button><br>
  <div>
    <router-view></router-view>
    <component :is="activeComp"></component>
  </div>
</template>
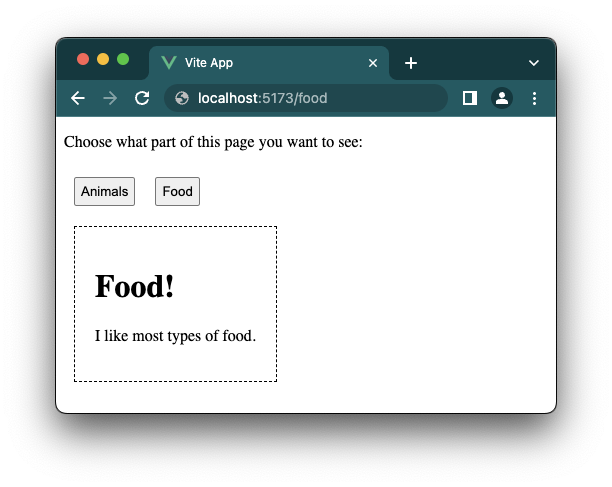
如果您已在計算機上完成上述更改,則可以在瀏覽器中專案的 URL 地址中新增“/food”,頁面應更新以顯示食物內容,如下所示
使用 <router-link> 元件
我們可以用 <router-link> 元件替換按鈕,因為它與路由器配合得更好。
我們不再需要“activeComp”資料屬性,因此可以刪除它,實際上我們甚至可以刪除整個 <script> 標籤,因為它是空的。
App.vue:
<template>
  <p>Choose what part of this page you want to see:</p>
  <router-link to="/animals">Animals</router-link>
  <router-link to="/food">Food</router-link><br>
  <div>
    <router-view></router-view>
  </div>
</template>

<script></script>
為 <router-link> 元件設定樣式
<router-link> 元件渲染為 <a> 標籤。如果我們在瀏覽器中右鍵單擊元素並檢查它,我們可以看到這一點
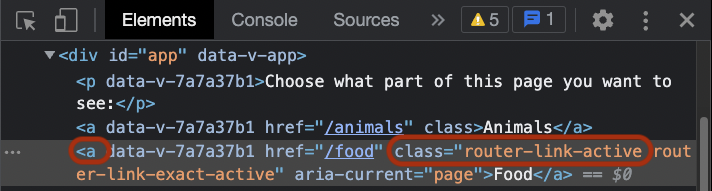
正如您在上面的截圖中看到的,Vue 還會跟蹤哪個元件是活動元件,併為活動的 <router-link> 元件(現在渲染為 <a> 標籤)提供“router-link-active”類。
我們可以使用上面的資訊來設定樣式,以突出顯示哪個 <router-link> 元件是活動的
示例
App.vue:
<template>
  <p>Choose what part of this page you want to see:</p>
  <router-link to="/animals">Animals</router-link>
  <router-link to="/food">Food</router-link><br>
  <div>
    <router-view></router-view>
  </div>
</template>

<style scoped>
  a {
    display: inline-block;
    background-color: black;
    border: solid 1px black;
    color: white;
    padding: 5px;
    margin: 10px;
  }
  a:hover,
  a.router-link-active {
    background-color: rgb(110, 79, 13);
  }
  div {
    border: dashed black 1px;
    padding: 20px;
    margin: 10px;
    display: inline-block;
  }
</style>
注意:在上面的示例中,URL 地址未更新,但如果您在自己的機器上執行此操作,URL 地址將會更新。即使 URL 地址未更新,上面的示例也有效,因為路由由 Vue 中的路由器在內部處理。

